The safest way to upgrade Ruby on Rails is to get your tests passing first, upgrade Ruby on its own, then move Rails one minor version at a time, running bin/rails app:update and your test suite at every stop. That is the path the official Rails upgrade guide lays out, and it works whether you are going from 6.1 to 7.0 or from 7.2 to 8.0. What changes from app to app is how much work each stop contains. If your application carries revenue, a skipped version or a thin test suite turns a routine upgrade into a project, and that is the point where a senior team that has done it before saves you weeks. We build and migrate custom platforms for brands with real volume, and the upgrade is often the first step of a wider modernization.
This guide is for the people who own a Rails application and the business that depends on it: founders, product and operations leads, and the engineers who report to them. It covers how to assess the work, the exact order of steps, what to check for Rails 7 and later, and how to deploy without surprises.
TL;DR
- Get a passing test suite before you touch the Gemfile. The Rails guide says that without good coverage you must manually exercise every changed feature.
- Upgrade Ruby separately and first, then Rails, one minor version at a time. Do not jump from 6.1 straight to 8.
- After changing the Rails version, run
bin/rails app:update, review every diff it proposes, and document the decisions you make. - Check the Ruby minimum for your target: Rails 7.0 and 7.1 need Ruby 2.7.0, Rails 7.2 needs 3.1.0, and Rails 8.0 and 8.1 need 3.2.0.
- Roll out in stages with a written rollback plan, so a bad release is a quick reversal and not an outage.
Table of Contents
- Why upgrade at all
- Assess the size of the job first
- Get tests in place before anything else
- Upgrade Ruby first, on its own
- The step-by-step Rails upgrade
- Using rails app:update well
- Special notes for Rails 7 and later
- Deploy without downtime or regressions
- When the upgrade is really a modernization
- Common mistakes that cost weeks
- What we do on upgrades like this
- Our perspective
- FAQ
- Sources
Why upgrade at all
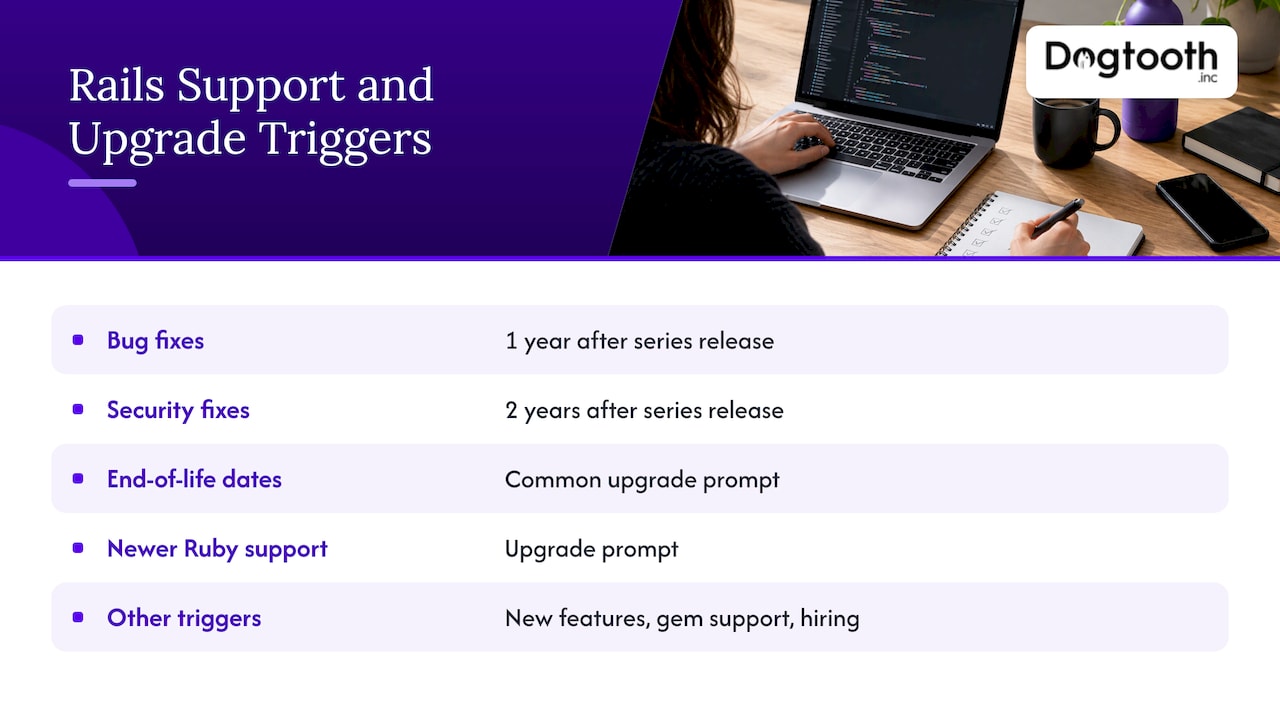
Rails does not support old versions forever. The Rails maintenance policy gives each minor release bug fixes for one year and security fixes for two years after the first release in its series. Once your version falls out of that window, a newly discovered vulnerability in the framework will not be patched for you. That is the clearest business reason to upgrade: security exposure grows every month you wait, and the gap you must later close grows with it.
Other triggers are practical. GitLab’s engineering handbook notes that upgrades are often prompted by end-of-life dates, support for a newer Ruby, or useful new Rails features. You may also find that a gem you want no longer supports your Rails version, or that hiring engineers for a very old stack takes longer than it should.
The Rails guide frames the decision plainly: weigh whether new features and support justify the time and skills you have available. For most production apps the answer is yes, and the real question becomes how to do it without disrupting customers.
Assess the size of the job first
Google results for this topic keep returning the same estimating question, and the honest answer is that it depends on the application. One widely shared estimate says a simple app might upgrade in hours while a legacy monolith could take weeks or months. What drives the range is predictable.
The factors that decide effort
- How far behind you are. Each minor version brings its own deprecations and behavior changes. Three versions behind means three rounds of fixes.
- Test coverage. Good tests turn an upgrade into a loop: change, run, fix. No tests means someone clicks through the app by hand after every step.
- Gem health. Gems that are abandoned or pinned to old versions are the most common blockers. Make a list of every dependency and check whether it supports your target Rails version.
- Custom patches and monkey-patching. Code that reaches into Rails internals breaks when the internals change.
- Ruby version. A Ruby upgrade may be required before Rails will move at all, which is a separate piece of work.
- Deployment complexity. More servers, workers, background jobs and environments mean a longer, more careful rollout.
A quick inventory you can do in an afternoon
- Record your current Ruby and Rails versions and the target you want.
- Run your test suite and note the pass rate and runtime. If it is red already, fixing that is step one.
- List gems and mark any that are unmaintained or pinned.
- Search the codebase for deprecation warnings in your logs and CI output.
- Write down which features make you money (checkout, billing, booking, onboarding) so they get the most careful testing.
That inventory gives you a defensible estimate. It also tells you whether this is a job for your current team in a few sprints or something to hand to specialists.
Get tests in place before anything else
The Rails guide is direct on this: have good test coverage before you upgrade, because the tests are how you learn what broke. If your suite is thin, write tests around the revenue-critical paths first. You do not need 100 percent coverage. You need confidence in sign-up, login, checkout or invoicing, admin actions and any integration that moves money or data.
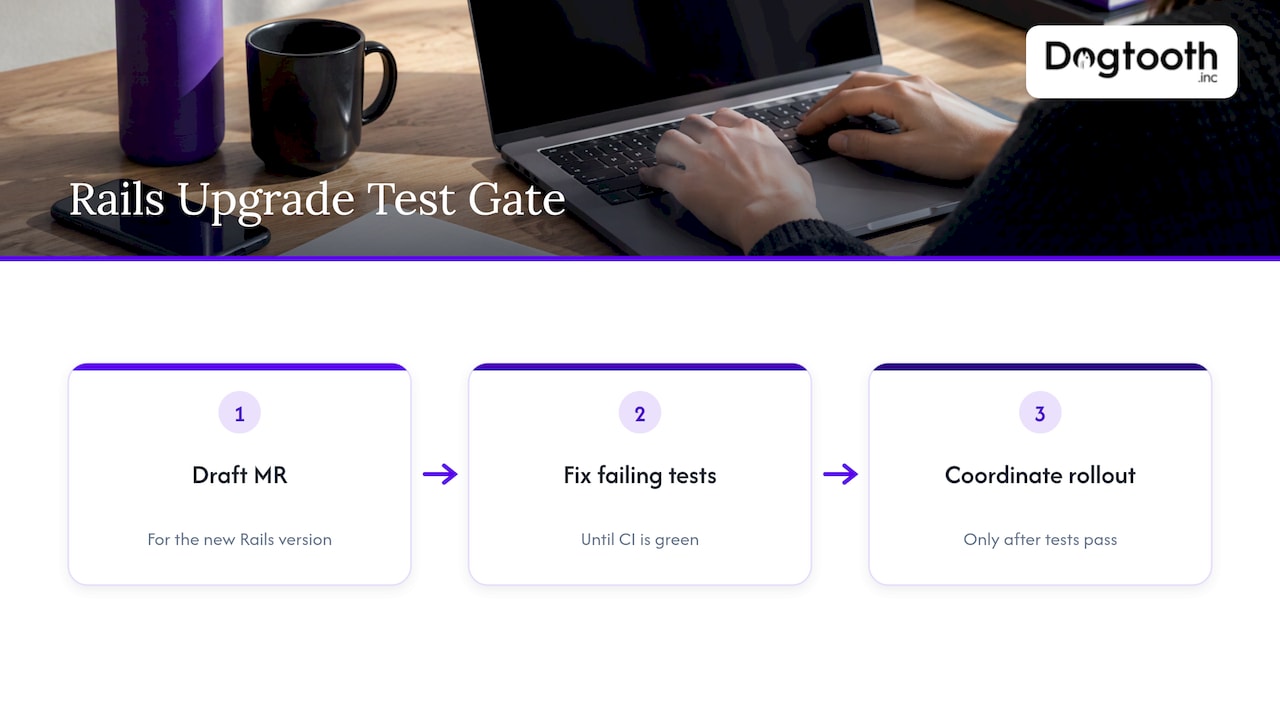
GitLab’s process shows the discipline in practice: it opens a draft merge request for the new Rails version and fixes failing tests until CI is green before it coordinates any rollout. Adopt the same rule. No deploy until the pipeline for the new version passes.
If you inherited an app with almost no tests, this step can be the largest part of the project. It is also the most valuable, because it outlasts the upgrade and makes every later change cheaper.
Upgrade Ruby first, on its own
The official guide tells you to upgrade Ruby separately and first, to the latest version your app can use. Keeping the two moves apart means that when something fails, you know which change caused it.
Rails sets a minimum Ruby for each release line. According to the current Rails upgrade guide:
| Rails version | Minimum Ruby |
|---|---|
| 7.0 and 7.1 | 2.7.0 |
| 7.2 | 3.1.0 |
| 8.0 and 8.1 | 3.2.0 |
The Rails 7.2 release notes explain why the floor keeps rising: Rails now drops Ruby versions that are end-of-life when a new minor version ships. So if you are on Ruby 2.7 and aiming for Rails 8, you have a Ruby upgrade to plan as well, and each Ruby step needs its own test run.
A sensible Ruby sequence:
- Pick the newest Ruby your current Rails version and gems support.
- Change the Ruby version in your version file, CI configuration and Dockerfile or hosting settings.
- Run
bundle install, then the full test suite. - Fix warnings and failures, deploy, and let it run in production for a while before starting on Rails.
The step-by-step Rails upgrade
This is the loop to repeat for every minor version between where you are and where you want to be. The official guide recommends it, and GOV.UK’s engineering manual follows the same shape: change the Gemfile, fix test errors, update configuration, switch defaults, update the schema and check the app locally.
Step 1: Work in a branch with a green baseline
Confirm the tests pass on your current version. Create a dedicated branch so the upgrade stays isolated from feature work. Freeze unrelated changes while you do this, or merge conflicts will multiply.
Step 2: Change the Rails version in the Gemfile
Bump to the next minor version, not the latest. Run bundle update rails and resolve dependency conflicts. This is usually where blocked gems surface. If the app also uses JavaScript packages tied to Rails, update those to the matching version.
Step 3: Run the update task
Run bin/rails app:update. The task interactively creates or changes configuration files to match the new version. It will ask before overwriting, so read each prompt and look at the diff. Do not accept everything blindly.
Step 4: Fix test failures and deprecations
Run the suite. Work through failures from the most basic (boot errors) to the most specific. Deprecation warnings in the current version are your to-do list for the next one, so clear them while the context is fresh.
Step 5: Move configuration defaults deliberately
Rails ships new framework defaults with each version, and the upgrade guide describes a way to adopt them gradually instead of all at once. Turning on defaults in small batches keeps each change testable and reversible.
Step 6: Check the app by hand
Even with strong tests, run the application locally and walk the main flows. Look at the background jobs, email sending, file uploads and any third-party integration.
Step 7: Repeat, then deploy
Once a version is green and verified, commit it, and only then start on the next. Deploy at sensible checkpoints rather than holding every version for one giant release. Smaller releases are easier to roll back and easier to diagnose.
Using rails app:update well
The Rails guide says to run bin/rails app:update after changing the version in the Gemfile and to review the diffs for unexpected changes. The command is a helper, not an authority. It suggests changes based on your configuration, and GOV.UK’s guide points out that the right choices depend on which railties and engines you have enabled and whether the app is API-only, so your team has to decide using the context of your app.
A review routine that holds up:
- Apply your code formatter (for example RuboCop) so the diff shows real changes, not whitespace.
- Read each changed file. Ask what the change does and whether your app depends on the old behavior.
- Record the decision, in the commit message or the upgrade notes, for anything you accepted, rejected or deferred.
That last habit pays off a year later, when someone wonders why a setting differs from the default.
Special notes for Rails 7 and later
People searching for a Rails 7 upgrade usually want to know what to check. Start with Ruby, as covered above: 7.0 and 7.1 need Ruby 2.7.0 or newer, and 7.2 needs 3.1.0 or newer.
The Rails 7.2 release notes also give a specific instruction: if you are upgrading an existing application, move to Rails 7.1 first, verify it works, and keep good test coverage before proceeding to 7.2. That is the one-minor-at-a-time rule applied to a real boundary.
A practical path for a 6.x app aiming for current Rails therefore looks like this:
- Get to the last 6.x minor and clear its deprecations.
- Upgrade Ruby to a version both 6.x and 7.0 accept.
- Move to 7.0, then 7.1, then 7.2, verifying and deploying at each stop.
- Raise Ruby to at least 3.2.0, then continue to Rails 8.0 and 8.1.
The guide’s release-specific sections list the behavior changes and removed features for each version, so read the section for every version you pass through, not only the final one.
Deploy without downtime or regressions
A green test suite is necessary, not sufficient. Production has real data, real traffic and integrations your tests only approximate. Large teams handle this with staged rollouts, and the pattern scales down to smaller ones.
GitLab’s upgrade runbook calls for a test rollout weeks before production, a written rollback strategy, and coordination with the people watching the release. Its Rails 7 effort deployed first to a canary environment, then to production, for a couple of hours at a time. The runbook also describes rollback as draining the problem canary and returning to a package built with the previous Rails version. GitLab’s timings are its own procedure, not a universal estimate, but the logic is portable.
For your own release:
- Stage first. Run the upgraded build in a staging environment that mirrors production, with a recent copy of real data where policy allows.
- Release to a small slice. If you have a canary server or feature-flag capability, send a fraction of traffic to the new version before everyone.
- Write the rollback before you need it. Know which build you return to, who decides, and how database migrations behave in reverse.
- Watch the right signals. Error rates, slow requests, failed background jobs, checkout completion and email delivery tell you more than uptime alone.
- Choose a quiet window. Not the day before a campaign or a seasonal peak.
If your upgrade comes with a content or platform move, such as shifting data between systems, resources like these show the sort of tooling that eases that part of validation.
Database changes deserve extra care. Schema updates that lock large tables can cause the downtime you were trying to avoid. Our guide to database migration strategy covers how to choose an approach, plan it and cut over safely, and the same thinking applies when a Rails upgrade includes schema changes.
When the upgrade is really a modernization
Sometimes the upgrade exposes a bigger problem: the app is several major versions behind, tests are missing, key gems are dead and the original developers are gone. Forcing it through one version at a time is still correct, but at that point you are doing a legacy modernization, and it helps to plan it as one.
The approach that reduces risk is to avoid a single risky cutover. Our write-up on legacy system migration in five phases explains how to stage the work, and the article on API modernization without a big bang shows how to replace pieces incrementally while the old system keeps running. For a real example of a long-neglected platform brought forward, see our Drupal 6 research platform migration.
Common mistakes that cost weeks
- Skipping versions. Jumping several minors at once buries you in overlapping errors and makes the cause of each failure unclear.
- Upgrading Ruby and Rails together. When both change, you cannot tell which broke the build.
- Accepting every app:update change. Some suggestions do not fit your app. Review them.
- Ignoring deprecation warnings. They are free advance notice of what breaks next.
- Letting feature work continue on the same branch. Conflicts eat the time you saved.
- No rollback plan. The first production surprise becomes an incident instead of a revert.
What we do on upgrades like this
Dogtooth Inc. is a technical agency that builds custom platforms and runs legacy system migrations. Our senior team ships weekly and stays on after launch, so the upgrade does not end with a hand-off and a hope. If your Rails application is behind, thin on tests or tied to systems that also need to move, talk to us about a platform build or migration.
We also run integrations and APIs, AI agents that work inside real workflows, and email infrastructure and deliverability, which means an upgrade can be the start of broader efficiency work rather than a one-off chore.
Our perspective
An upgrade is rarely only an upgrade. The version bump is the visible part. Underneath it sits the question of whether the application is something the business can keep changing safely.
When we take on legacy platforms, the pattern repeats: the teams that struggle are not the ones with an old version number, they are the ones with no safety net. Tests, a clear rollback and small releases are what make a change boring, and boring is what you want from an upgrade.
That is why we work the way we do: a senior-led team, weekly shipping and a commitment to stay after launch. We run our own operation on the same kind of systems we build for clients, so we know what it takes to keep software healthy after the project ends. If your Rails app has fallen behind, treat it as a chance to leave it better than you found it.
Chase Weir
FAQ
How long does a Rails upgrade take?
It depends on how far behind the app is, how good the tests are and how many gems block the way. A small, well-tested app can move in hours per version, while a large legacy monolith can take weeks or months. Do the inventory described above to turn that range into a real estimate for your app.
Can I skip Rails versions?
The official guide recommends moving one minor version at a time. The Rails 7.2 release notes say the same for that boundary: reach 7.1 and verify it before moving to 7.2. Skipping versions mixes the deprecations and behavior changes of several releases into one confusing debugging session.
Do I upgrade Ruby or Rails first?
Upgrade Ruby first and on its own, to the latest version your app can use. Then upgrade Rails. Check the minimum Ruby for your target Rails line, since Rails 8.0 and 8.1 require Ruby 3.2.0 or newer.
What does rails app:update do?
After you change the Rails version in your Gemfile, bin/rails app:update interactively creates or changes configuration files to match the new version. Review each diff for unexpected changes and note your decisions so future developers understand them.
Is it safe to upgrade without tests?
The Rails guide says to have good test coverage first, and that without automated tests you must manually exercise everything that changed. Writing tests around your revenue-critical paths before upgrading is the safest route.
Sources
- Upgrading Ruby on Rails, Ruby on Rails Guides
- Ruby on Rails 7.2 Release Notes
- Ruby on Rails Maintenance Policy
- Rails Upgrade, The GitLab Handbook
- Rails upgrades runbook, GitLab release docs
- How to upgrade Rails, GOV.UK Developer Documentation